Category Archives: How to

How to Hide Last Seen on Truecaller

How to Hide last seen on Truecaller in Android and iPhone

Truecaller is a widely used app that helps you identify unknown callers, block spam calls and messages, and provide various other features related to phone communication. One of the features of the app is the Last Seen feature, which lets your contacts know when you were last active on the app.

While this feature can be helpful in some situations, many users prefer to maintain their privacy and not disclose when they were last active. If you’re one of those users who want to hide their last seen on Truecaller, you’ve come to the right place. In this article, we will guide you through the steps of how to hide last seen on Truecaller on Android and iPhone devices.

The last seen feature in Truecaller is termed as Availability feature, which lets your contacts know whether you are available or not. However, if you want to maintain your privacy and not let others know whether you are available or not, you can turn off the Availability feature on Truecaller.

The steps to turn off last seen on Truecaller in android and iPhone devices are the same. Before you move ahead you must see what is truecaller last seen means and how does truecaller last seen work

What is Truecaller last seen means

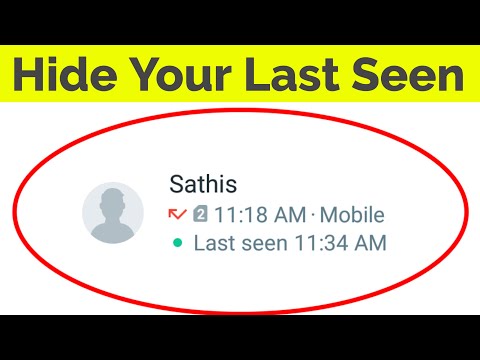
Truecaller Last Seen is a feature that displays the last time a user was active on the Truecaller app. This means that if you have the Last Seen feature turned on, your contacts can see when you were last active on the app. The feature works similarly to the “Last Seen” feature on messaging apps like WhatsApp and Facebook Messenger.

Why hide last seen on Truecaller

While the Last Seen feature can be helpful in some cases, such as knowing when a contact is available to talk, it can also be a privacy concern for some users. Some people prefer to keep their online activity private and do not want their contacts to know when they were last active on the Truecaller app.

There can also be security concerns. Hiding your last seen on Truecaller can also help protect your security. If a spammer or unknown caller sees that you were recently active on the app, they may be more likely to target you with unwanted calls or messages.

Also Read: How to Change Name in Truecaller Quickly [100% Working]

How to Hide Last Seen on Truecaller in Android and iPhone

These are the steps to hide the last seen in Truecaler on Android and iPhone:

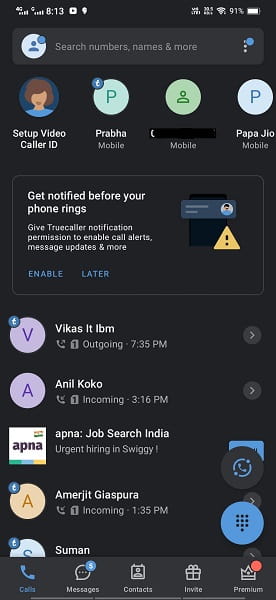
1. Open the Truecaller app on your Android device.

2. Tap on the three dots in the top-right corner of the screen to open the menu.

3. Select “Settings” from the menu.

4. Scroll down and tap on “Privacy Center”.

5. Turn off the “Availability” option.

Once you turn off the “Availability” option, your contacts will not be able to see whether you are available or not and your last seen status on Truecaller will be hidden from other users. They will no longer be able to see when you were last active on the app.

It’s important to note that hiding your last seen status on Truecaller also means that you will not be able to see the last seen status of other users on the app. This is because the feature is mutually exclusive, and you can’t hide your last seen status without also hiding the last seen status of others.

How to Remove Truecaller as Default Dialer in a Few Simple Steps

How to disable Full Screen Caller ID in Truecaller

Video Tutorial on How to Hide last seen on Truecaller

Here is the video tutorial to hide the last seen in the Truecaller app.

Truecaller last seen depends on what?

The last seen feature is based on the user’s activity on the Truecaller app, and it is updated in real-time. This means that when a user opens the app, their last seen status will be updated to reflect that they are currently active on the app.

The last seen status on Truecaller is similar to the last seen feature on other messaging apps like WhatsApp and Telegram. It allows users to know when their contacts were last active on the app, making it easier to communicate with them.

Truecaller last seen not showing

If your Truecaller last seen is not showing, there could be several reasons for this. Here are some of the most common reasons why your Truecaller last seen might not be visible:

  • You have turned off the Last Seen feature.
  • You are not connected to the internet.
  • You have logged out of the Truecaller app.
  • Your Truecaller app is outdated.
  • Other technical issues.

You should check your privacy settings, internet connection, app version, and device status to identify and resolve the issue. If none of these solutions work, you can reach out to Truecaller’s support team for further assistance.

Another reason could be the other person may have blocked you. To know whether someone has blocked you on Truecaller here is the tip: How to Know If Someone Blocked You on Truecaller Without Calling

How to turn on last seen in Truecaller

By default, Truecaller’s last seen feature is turned on. However, if you have previously turned off this feature, you can turn it back on by following the same steps as told above for hiding the last seen in Truecaller. Just turn on the Availability option in the last step. Your last seen will be turned on in Truecaller.

How to see hidden last seen on Truecaller

It’s not possible to see a user’s hidden last seen on Truecaller. The app’s privacy settings allow users to choose whether or not they want to display their last seen status to others, and users who choose to hide their last seen status will not be visible to other users on the app.

If you are unable to see a user’s last seen status on Truecaller, it’s likely that the user has chosen to hide their last seen status. In this case, you can still send messages and make calls to the user, but you will not be able to see their last seen status.

How to hide Truecaller on call

If you would like to hide Truecaller on calls, you can follow these steps:

  1. Open the Truecaller app on your Android or iOS device.
  2. Tap on the three dots in the top-right corner to open the app’s menu.
  3. Tap on the “Settings” option in the menu.
  4. Scroll down and find the “General” option.
  5. Tap on the “General” option.
  6. In the General settings, you will see the “In-call settings” option.
  7. Tap on the “In-call settings” option.
  8. Toggle the “In-call notification” switch to the off position.

Once you have turned off the in-call notification, Truecaller will no longer display during phone calls. This means that your contacts will not see the Truecaller logo or any information about the call on their screen.

How to freeze last seen on Truecallers

Unfortunately, it’s not possible to freeze your last seen status on Truecaller. The app’s last seen feature is designed to show the last time you were active on the app in real-time, and it’s not possible to change or freeze this information. However, you can choose to hide your last seen status on Truecaller.

Truecaller last seen after 7 days

Truecaller’s last seen feature updates in real-time, meaning that it shows the last time a user was active on the app. However, if a user has not been active on Truecaller for more than 7 days, their last seen status will not be visible to other users.

This is because Truecaller’s last seen status is designed to be a real-time indicator of a user’s activity on the app. If a user has not been active on the app for more than 7 days, it’s assumed that they are no longer using the app or have logged out, and their last seen status is hidden to protect their privacy.

How can I hide myself from Truecaller?

If you want to hide your personal information from Truecaller and prevent other users from seeing your phone number, name, and other details, you can follow these steps:

  1. Open the Truecaller app on your Android or iOS device.
  2. Tap on the three horizontal lines in the top-left corner to open the app’s menu.
  3. Tap on the “Settings” option in the menu.
  4. Scroll down and find the “Privacy center” option.
  5. Tap on the “Privacy center” option.
  6. In the Privacy center, you will see several options to control your privacy on Truecaller.

If you want to hide your personal information from Truecaller, you can toggle the “Who can see my profile” option to “Private.” This will prevent other users from seeing your name, phone number, and other details when they search for you on Truecaller.

You can also toggle the “Who can find me” option to “Private” to prevent other users from finding you on Truecaller by searching for your phone number.

FAQ on How to Hide last seen on Truecaller

1. How can I change my last seen on Truecaller?

Ans: Unfortunately, it’s not possible to change your last seen status on Truecaller. The app’s last seen feature is designed to show the last time you were active on the app in real-time, and it’s not possible to change or manipulate this information.

2. How does Truecaller last seen work?

Ans: This feature works by tracking your activity on the app and displaying the timestamp of your last activity, such as the last time you used the app or the last time you updated your profile. When you open the Truecaller app, the app sends a signal to the server to let other users know that you’re active on the app.

3. Can someone know if I searched them on Truecaller?

Ans: No, Truecaller does not notify users when someone searches for their phone number or name on the app. When you search for a phone number or name on Truecaller, the app does not disclose your identity or provide any information to the person you are searching for.

4. Whose last seen can I see on Truecaller?

Ans: On Truecaller, you can see the last seen status of other Truecaller users who have enabled this feature.

5. Is Truecaller last seen accurate?

Ans: Truecaller’s last seen feature is designed to be accurate and reliable, but there may be some factors that can affect the accuracy of the information displayed. If you have concerns about the accuracy of your last seen status on Truecaller, you may want to check your app settings and ensure that you have the latest version of the app installed on your device.

6. How can I track someone using Truecaller?

Ans: You cannot use Truecaller to track someone’s location in real-time, as the app does not have this feature. Additionally, if the person you are trying to track has not enabled their last seen feature or has set their profile to private, you will not be able to see their activity on the app.

Conclusion for How to Hide last seen on Truecaller

Hiding your last seen on Truecaller can help you maintain your privacy and prevent others from knowing when you were last active on the app. Whether you are using an Android or iPhone, the process of hiding your last seen in the Truecaller app is simple and can be done in just a few steps.

However, keep in mind that this feature is mutually exclusive, and you will not be able to see the last seen status of other users once you have hidden your own last seen.

How to Remove Truecaller as Default Dialer | Disable Truecaller Dialer

Truecaller is a popular app that helps users to identify and block spam calls and messages. However, if you have set Truecaller as your default dialer, it may cause some inconvenience while making calls or sending messages. So if you are searching for the solution of how to remove Truecaller as default dialer then you will find your solution here.

In this article, we will guide you through the steps to remove Truecaller as your default dialer.

Why Remove Truecaller as Default Dialer?

Before we move on to the steps to remove Truecaller as your default dialer, let’s understand why you may want to do so.

While Truecaller offers many useful features, such as identifying and blocking spam calls and messages, it may not be the best option as a default dialer for all users. 

Some users may prefer to use their device’s default dialer app or a third-party app that offers more features than Truecaller. 

Some users may find it overwhelming or unnecessary and wish to remove it as their default dialer.

Additionally, if you have recently installed Truecaller and set it as your default dialer, you may want to revert to your previous default dialer for consistency and familiarity.

We searched on the internet and came to know that many people are searching for removing Truecaller as their default dialer. These are the questions asked by the people:

  • How to remove Truecaller as default dialer redmi
  • How to remove Truecaller as default dialer in Samsung phone
  • How to remove Truecaller as default dialer in miui 12
  • How to remove Truecaller as default dialer vivo
  • How to remove Truecaller as default dialer in oneplus
  • How to remove Truecaller as default dialer in Realme
  • How to remove Truecaller as default dialer in Redmi note 5 pro
  • How to change default dialer from Truecaller in mi hone

So we found the solution and In this article, we will explain how to remove Truecaller as the default dialer on an Android device, step by step.

How to Remove Truecaller as Default Dialer

If you want to remove Truecaller as your default dialer app, follow the steps below:

  1. Open your phone’s settings: Firstly, you need to open your phone’s settings. You can do this by tapping the settings icon on your home screen or app drawer.
  2. Find the Apps section: After opening the settings, you need to scroll down and find the ‘Apps’ or ‘Applications’ section. In some phones, it may be called ‘Application Manager’ or ‘Manage Apps.’
  3. Locate the Truecaller app: In the list of apps, you need to find the Truecaller app. You can do this by scrolling down the list of apps or by using the search bar to search for the Truecaller app. 
  4. Tap on Truecaller: Once you have located the Truecaller app, tap on it to open the app settings.
  5. Tap on ‘Set as default’: In the Truecaller app settings, you will see an option called ‘Set as default.’ Tap on this option.
  6. Clear default settings: After tapping on ‘Set as default,’ you will see a list of available options for setting the default dialer app. Tap on ‘Clear defaults.’
  7. Choose your default dialer: Now, you need to choose your preferred default dialer app. You can choose any dialer app from the list of available options.
  8. Confirm your choice: Once you have selected your preferred dialer app, tap on ‘Set as default’ to confirm your choice.
  9. Restart your phone: After changing your default dialer app, it is recommended to restart your phone. This will ensure that the changes take effect properly.

Video tutorial on how to Remove Truecaller as Default Dialer

If you also want to remove Truecaller as the default messaging app then you can see this article on How to Remove Truecaller as Default Messaging App Quickly

How do I make my phone my default calling app?

If you want to set your phone app as your default calling app then follow these steps:

Step 1: Open the Settings App

The first step to removing Truecaller as the default dialer on your Android device is to open the Settings app. This can usually be done by tapping on the gear icon in your app drawer or by pulling down the notification shade and tapping on the gear icon there.

Step 2: Navigate to the Apps & Permission Section

Once you have opened the Settings app, scroll down until you find the Apps & Permission section. This section may be located in different places on different devices, but it is usually located under the Device or System section.

Step 3: Tap on Default Apps

In the Apps & notifications section, you will find a variety of options related to managing your device’s apps and notifications. Tap on the Default apps option to proceed.

Step 4: Tap on the Phone App

Under the Default apps section, you will see a list of options for different types of default apps, such as your default browser or messaging app. Find the Phone app option and tap on it.

Step 5: Select a New Default Phone App

Once you have opened the Phone app section, you will see a list of all the phone apps that are currently installed on your device. Select the phone app that you want to use as your default dialer by tapping on it.

Step 6: Confirm Your choice

After selecting your new default phone app, you may see a confirmation prompt asking you to confirm your choice. If you see this prompt, tap on the option to confirm that you want to change your default phone app.

Step 7: Exit the Settings App

After confirming your choice, you can exit the Settings app. Your Android device will now use the new default phone app you selected for all outgoing calls and texts.

How do I Remove Truecaller From My Phone?

If you want to completely remove Truecaller from your Android device, you can follow these additional steps:

  1. Open the Settings App on your Android device, as described in Step 1 above.
  2. Scroll down until you find the Apps & notifications section and tap on it, as described in Step 2 above.
  3. In the Apps & notifications section, you will see a list of all the apps that are currently installed on your device. Find Truecaller in this list and tap on it.
  4. After opening the Truecaller app, you will see a variety of options related to managing the app, such as uninstalling the app. Tap on uninstall.
  5. Confirm that you want to uninstall the app.
  6. Wait for the uninstallation process to complete.
  7. Done, Truecaller is completely removed from your phone. 

Truecaller will be removed from your device and you can no longer use it as your default dialer.

Keep in mind that uninstalling Truecaller will also remove any data associated with the app, such as your call history or saved contacts.

Also Read:

FAQs on How To Remove Truecaller as Default Dialer

How do I change my default dialer?

You can change the default dialer of your phone by following the steps mentioned above for How do I make my phone my default calling app. Follow all seven steps and you will be able to change your default dialer.

Conclusion for How to Remove Truecaller as Default Dialer

Removing Truecaller as your default dialer is a simple process that can be done in just a few steps. By clearing Truecaller’s default settings and choosing a new default dialer, you can ensure that your phone uses the app you prefer for making phone calls. If you no longer want to use Truecaller on your device, you can also uninstall it from your phone’s settings.

What is Netplus Wifi Roaming and How to Activate it?

To understand what is Netplus Wifi Roaming let us first see what is wifi roaming and how you can activate it.

What does WiFi roaming mean?

WiFi roaming is a feature that allows wireless devices such as smartphones, laptops, and tablets to seamlessly switch between different wireless access points (APs) or routers as they move from one location to another.

When a device is connected to a WiFi network and moves beyond the range of the initial access point, the device can automatically switch to another nearby access point, without interrupting the ongoing network connection or requiring the user to manually reconnect to a new network. This process is known as WiFi roaming.

Roaming is often used in public places such as airports, hotels, cafes, and shopping centers, where multiple access points are available to provide reliable and uninterrupted wireless connectivity. 

WiFi roaming is a common feature in modern wireless networks and allows users to stay connected to the internet wherever they go without experiencing any service interruptions

What is Netplus Wifi Roaming?

Netplus WiFi roaming is a service provided by Netplus Broadband, a leading internet service provider in India. It is a feature that allows Netplus broadband customers to seamlessly connect to the internet when they are away from their home network.

With Netplus WiFi roaming, customers can access the internet on their devices without having to manually connect to different WiFi networks as they move around. The service works by allowing customers to connect to any of the thousands of Netplus WiFi hotspots available across India.

Customers can use their Netplus broadband username and password to authenticate and connect to these hotspots, and their data usage will be charged to their existing broadband account. If you don’t know your username here is how to find netplus username.

How to Activate Netplus Wifi Roaming?

Ensure that you are an existing Netplus broadband customer. You must have an active Netplus broadband account to use the WiFi roaming service.

To activate Netplus WiFi roaming, you need to follow these steps:

  1. Visit the WIFI Roaming Activation – Netplus Broadband website and fill in the details as shown in the image below.
  2. Enter OTP to confirm your account and upload a screenshot of the device showing the MAC address.
  3. Click on the Submit button. Your request to activate Netplus WiFi Roaming will be sent. 
  4. After some time you will get a confirmation email from Netplus.
  5. Your Netplus Wi-Fi roaming service will be activated.

Here is the video tutorial for Netplus WiFi roaming Activation

If you have any issues with activating Netplus WiFi roaming, you can contact Netplus customer support for assistance.

Netplus wifi range

In general, the range of Netplus WiFi is comparable to other high-speed WiFi networks and can cover a typical home or small office space. However, if you have a larger space or a particularly challenging layout, you may need to install additional access points or wireless range extenders to ensure reliable coverage throughout your space.

Frequently Asked Questions on Netplus wifi Roaming 

What is Wifi roaming netplus email id?

You can visit the official Netplus Broadband website and look for the “Contact Us” or “Support” section to find the email address and other contact information for Netplus customer support. You can also try calling their customer support number or using the live chat feature on their website for immediate assistance.

What is Netplus wifi Customer care number?

If you are a Netplus Broadband customer and need assistance, you can contact their customer care number at 1800-419-0419. This number is toll-free and available 24/7 to assist customers with any issues or queries related to their broadband connection, including WiFi roaming.

If the tall free number does not work you can you can reach them at this Netplus Customer Care Number +91 7087570875

You can also visit the Netplus Broadband website and look for the “Contact Us” section to find other ways to get in touch with their customer support team, such as by email, live chat, or filling out a support form.

What is Netplus roaming password?

The default Netplus WiFi roaming password is 123456789. You can use this password to connect any Netplus WiFi hotspot across India. After entering password you need to change wifi privacy settings to Use Device Mac from default Mac address.

Also Read: How to change Netplus wifi password and name

Is wifi roaming good?

WiFi roaming can be a convenient and useful feature for those who are frequently on the move and need to stay connected to the internet. It allows you to automatically connect to available WiFi hotspots as you move from one location to another, without having to manually connect to each network.

Additionally, WiFi roaming may not be as secure as a private, password-protected network, as you are sharing the same network with other users. Therefore, it’s important to take proper security precautions when using WiFi roaming, such as using a virtual private network (VPN) to encrypt your connection and protect your sensitive data.

Overall, WiFi roaming can be a useful feature for those who need to stay connected while on the move, but it’s important to consider the potential drawbacks and take necessary security measures to ensure your safety and privacy.

What is Wifi roaming protocol?

The WiFi roaming protocol specifies how devices such as smartphones, laptops, and tablets can switch between different WiFi networks when moving from one area to another. The protocol is designed to ensure that devices can seamlessly switch between networks without interrupting their connection or losing data.

The most common WiFi roaming protocol used today is called the 802.11r standard, also known as Fast Basic Service Set Transition (FT). This protocol allows devices to pre-authenticate with nearby networks before actually connecting to them, which can significantly reduce the amount of time it takes to switch between networks.

Final words on Netplus wifi Roaming 

Netplus WiFi Roaming is a service that allows customers of Netplus Broadband, an ISP in India, to access high-speed internet on their mobile devices or laptops while on the go. Customers can connect to Wi-Fi hotspots located across the country, including public places like airports, railway stations, malls, and cafes. The service is available for both prepaid and postpaid customers of Netplus Broadband.

9 Ways to Fix Unfortunately the process android.process.acore has Stopped

If you are an android mobile user then it is possible that you got this error which is Unfortunately the process android.process.acore has Stopped and now you are looking for a solution. But you don’t have to worry about it, because this is a general error that many people get on their android phones. You can easily fix this issue by following some steps.

The android.process.acore has stopped unexpectedly is an error associated with the applications of android phone. Generally, this error occurs while opening the contacts app. There are various reasons in android that cause this error and you can easily fix it.

If you are looking at why android.process.acore keeps stopping on my phone then your search is over because here I will tell you various methods to solve this issue. Just follow the step by step process and you will get rid of this error message. Your phone will start working normally after doing this.

But wait! Before just following the steps to fix the issue you should have an idea about What it means when the process android process media has stopped and why Android process Acore keeps stopping.

Android.process.acore has stopped Means

The meaning of the android process acore is that while opening an app in an android phone some error has occurred in its system and the android process has stopped. It means that when you tried to open the app and the app is unable to fetch the data properly from the android system and then as a result of it this error message appeared. Often this error occurs in the phone app and contacts app while opening it.

Why does my phone keep saying Android process Acore keeps stopping?

There are many reasons for getting this error message. The main reasons could be android OS not properly installed, incompatible android os version, application update corrupted, deficiency of RAM or its maximum utilization, Operating System Update in a pending state, Junk files, Third party apps. Let us discuss these in brief.

Reason for the error “android.process.acore has stopped”

  1. OS not properly installed: Suppose you got a system update in mobile and you started the system update process. There is a possibility that the android operating system is not properly installed due to some reason like low battery etc. So you should install the update properly which can fix this error.
  2. Incompatible android os version: Sometimes you install a custom ROM which is not compatible with your phone’s hardware. This is also the reason your android process keeps stopping.
  3. Application update corrupted: While updating the application sometimes updates get corrupted for some reason like network error which also causes this error.
  4. Deficiency of RAM or its maximum utilization: If you are using a mobile with less amount of RAM and you are trying to run a heavy app then this error could appear. On the other side if you are running many apps at a time and you are consuming full RAM then also you may get this error.
  5. Operating System Update in the pending state: If you have started system updates and it has not been completed yet then this could be the reason for your android process stopped error.
  6. Junk Files: When we remove or delete some app then its temporary files are still gets stored in the system. These are called junk files. These have to be cleared. Deleting the junk files could fix this issue.
  7. Third Party Apps: Sometimes you install an app from outside of the play store. These are called third party apps and these apps are sometimes cracked or corrupted. You should avoid installing third party apps to avoid this error.

These are the main reason for this error. There are some devices in which this “unfortunately the process android process acore has stopped” error has been found the most. These are Lenovo tablets, some Xiaomi phones, LG G2, G3, Sony Xperia etc. You can fix this issue on any android phone by following the method below.

How to fix Unfortunately the process android.process.acore has stopped

This error generally gets fixed by restarting your phone, clearing junk files, and clearing data of apps causing errors. But still, if your problem did not resolve then follow the step by step process of various methods which will definitely solve your problem.

Before proceeding please back up your phone’s complete data like contacts, messages, photos, audio and video files, document files etc. Taking a backup of your phone’s data is very important because your data could be lost.

1. Reboot Your Smartphone

The first method to fix this issue is to reboot or restart your android smartphone. Rebooting your device could fix this issue. When you reboot your smartphone, temporary data stored on RAM will be cleared and the phone will start afresh.

Follow these steps to Reboot your smartphone:

  1. Unlock your smartphone.
  2. Press and hold the lock/unlock key for three seconds.
  3. A Popup menu will appear, tap the reboot option as shown below.
  4. Your phone will start rebooting.

This method could help you to fix this error but if still the error exists, proceed to the next method.

2. Reset App Preference

When we use the android app for various purposes then the android system stores its preference in the form of data. This data may be the reason why android.process.acore keeps stopping. So you should reset your app preference by the following steps.

Steps to Reset App Preference:

  1. Go to Settings.
  2. Scroll down and go to Applications.
  3. Go to Application Manager.
  4. Tap on the three dots at the top right corner.
  5. Tap on reset App Preference.

This method has worked for many people. Your error could also be fixed. But if still getting the error try the 3rd method.

3. Clear data of Contacts App

This error mostly occurs due to the contacts app. so it is better to clear the app data. This will not clear your contacts stored on your phone and sim card. Follow the below steps to clear the data of the contacts app.

Steps to clear data of Contacts App:

  1. Go to settings.
  2. Scroll down and go to application settings.
  3. Go to all applications.
  4. Select the Contacts app.
  5. Delete Contacts app data.
  6. Force stop the application.
  7. Restart your phone.

4. Update Android System Operating System

You should check if the system update is available. If there is an update available then you should update your Android operating system. updating an OS fixes its bugs. It is always recommended that you regularly update your system.

Steps to Update Android OS:

  1. Go to settings.
  2. Scroll down and go to system update.
  3. Tap on check for updates.
  4. If the update is available tap on update now.

make sure your phone’s battery is at least 50 percent charged before updating. A system update may take some time so don’t worry about it.

5. Uninstall the App Causing error

There Could be some apps that are causing this error. If you are able to find this app then uninstall this app and try to install it again from the play store. You can also disable some system apps if you do not use those apps. When you will disable an app it will not take RAM memory and also it will not perform any background task.

Steps to disable an Application:

  1. Go to settings.
  2. Scroll down and go to application settings.
  3. Go to all applications.
  4. Select the app you want to disable.
  5. Tap on Disable.

You can uninstall the app by long-tapping it on the home screen but if your home screen layout is locked then first unlock the home screen layout in your phone.

6. Clear Phone’s Junk Files

Junk files are residual data stored on the phone’s memory after the deletion of some apps or some data. These are the waste data that may cause some errors in the phone. You should clear junk files from time to time.

Steps to clear Junk Files on your Android Device:

  1. Install the Files app from Play Store.
  2. Open Files app.
  3. On the bottom left, tap Clean.
  4. On the Junk Files section, tap clean and confirm.
  5. Tap See Junk Files.
  6. Select the files option you want to clear.
  7. Tap Clear.
  8. Again tap Clear on the confirmation pop up.

7. Clear System Partition Cache

Just like junk files the system partition cache also stores systems junk files which are the most temporary data, log files, and temporary data of various applications. Clearing the system partition cache will not delete any of your apps or phone data.

Steps to Clear System Partition Cache:

  1. Turn off your android device.
  2. Simultaneously press and hold the volume up + volume down + power key.
  3. Recovery mode will be opened.
  4. Use the volume up/down key to navigate.
  5. Select the wipe cache Partition by using the power key.
  6. Wait till the process completes.
  7. Select Reboot using the power key.
  8. Your phone will start normally.

This method is the solution to many errors and definitely will fix this issue too.

8. Factory Reset your Device

If nothing worked for you then you have this chance left. When you factory reset your device it will delete all the data stored on your phone so make sure you took a backup of your phone. Your phone will become all-new from the inside like it had come when you purchased it. This process will definitely fix the, unfortunately stopping of the process android.process.acore.

Steps to Factory Reset Your Device:

  1. Go to Settings.
  2. Scroll down and go to Backup and Reset.
  3. Select the Factory Reset option.
  4. Confirm and tap on Clear all.
  5. Enter your phone’s pin if asked.
  6. Your phone will start to Factory Reset.
  7. The phone will Restart and all data will be deleted.

This method will surely fix the error in your android device. But still, if the error occurs then you have the last step.

9. Contact Manufacturer

If nothing worked for you then you have to contact the manufacturer to fix this issue. You can bring your device to the customer care service center. They will solve your error for sure.

Frequently Asked Questions

What is the meaning of Acore?

The meaning of Acore is Main Thread. In other words, the main thread of the android system is called the acore. Thread is nothing but the process of a system in simple words. When this thread is unable to perform then it shows this error message unfortunately the process Android.process.acore has been stopped.

Also Read: How to fix error err_address_unreachable in Chrome

Android process acore has been stopped. I am unable to clear cache of contacts and contact storage. Is there any app to solve this problem ?

If you are unable to clear the cache of the contacts app then you can download an app to do so. Go to play store and search for application manager. Install any well-rated app and use this app to clear the cache of the contacts app of your device.

Conclusion for Unfortunately the process android.process.acore has Stopped

In this article, we have tried our best to show you how you can fix the error Unfortunately the process android.process.acore has Stopped in Android Mobile. We have covered all the reasons for the android process acore error and its solutions with step by step guide to fix it.

If you find this article helpful, please share this post and comment on your feedback and suggestions below. Keep visiting our blog for such useful content.

How to fix err_address_unreachable in Chrome Android, Windows, Mac, Ubuntu

Whenever a person browses on the internet then there is a chance that he may get some error instead of the required result. One of those errors is err_address_unreachable. Whether it be Chrome Mobile or Chrome Windows, Mac, Ubuntu there is a chance that you get an error named err address unreachable along with a message this site can’t be reached.

The error code err_address_unreachable is a type of error that a browser shows when it is not able to connect to the server to get the required information. If chrome fails to connect to the server then we get this error on our device screen.

The error address unreachable is a very common and general error for all. To fix this error, you can try the following methods:

One possible way to fix the ERR_ADDRESS_UNREACHABLE error is to clear your browser cache and your DNS cache, which store temporary files and data from the websites you visit. Sometimes, these caches can be corrupted or outdated and cause errors when loading websites. To clear your browser cache, you can go to your browser settings and select Clear browsing data. To clear your DNS cache, you can open the command prompt and type ipconfig /flushdns. This may help your browser resolve the IP address of the website and establish a connection.

There are many ways to fix this issue. We have covered all the possible reasons for this error along with the solutions. Let us discuss them all.

What does err_address_unreachable mean?

The meaning of err_address_unreachable is that when we enter an address of a website in google chrome and chrome fails to reach the targeted website then it shows a message as ‘This site can’t be reached’ along with an error which is err_address_unreachable and sometimes Net::err_address_unreachable.

It simply means that google chrome tried to reach the targeted website but due to some reason it was unable to reach that website address and in that case, chrome shows that the address is unreachable in the form of this error as shown below.

Why does it say err_address_unreachable? Reasons for this error

When Google Chrome fails to load the web page or is unable to reach the targeted website then it reflects this error  to the device screen. There are many reasons for chrome not connecting to the web page. Therefore there are various reasons for getting this error.

These are the possible reasons for err_address_unreachable:

1. Server Problem

There could be an issue on the server side. Due to some reason server could be down and hence google chrome fails to connect to the server which causes it to show this error.

2. The wrong URL Entered

Sometimes user enters the wrong website URL by mistake. As the URL entered is not valid chrome is unable to connect to the website and it shows an address unreachable error.

3. Router Issue

There can be issues in the router either the hardware issue or issues with the settings. This issue prevents chrome to connect to the web page.

4. Proxy Connection Issue

If you are using the proxy server to access the targeted website then there could be a reason that the proxy connection is not allowing you to reach the web page.

5. DNS Cache Problem

Google Chrome stores the caches of various websites. The Chome’s DNS cache may cause the problem of err_address_unreachable.

6. Antivirus Issue

In the computer, the installed antivirus scans the website being searched and if the antivirus thinks that this website is spam or harmful then it blocks chrome to reach the website.

7. Slow Internet Connectivity

Sometimes the internet speed is very low to load a website. In that case, Google chrome shows this error err_connection_timed_out and in some cases, it shows Err_network_changed, and hence the address is unreachable.

How do I fix Err Address Unreachable?

If the problem is on the server side then you have to wait till the server fixes this issue but if the server is ok then In most cases this error gets fixed by restarting the system. But if this does not work then we have to follow the other possible fixes to solve this error.

If you are using Windows, Mac, Ubuntu, or Linux system then you can troubleshoot this issue by following the steps in the upcoming section. We will tell you all the possible solutions that you could try to fix the erraddressunreachable error.

How to fix Err_address_unreachable Chrome for Desktop (Windows, Mac, Ubuntu, or Linux )

If there is no issue on the server side then the problem could be on your side and you could fix this error very easily. First of all, check your internet connectivity. If the internet is working fine then you can try all the possible solutions to fix err_address_unreachable as mentioned below.

Restart your Router and Computer

The very first thing you should do is to restart your router and computer. If the error is due to a router issue or internet issue then after restarting the router this error err_address_unreachable would be fixed.

To restart your router follow these steps:

  1. Turn off The router
  2. Leave it for 3 to 4 minutes.
  3. Turn on the router.
  4. Connect with your computer.

Try connecting to the website. In most cases restart works but if still, you are getting the same error message then you should reset your router.

Reset Your Router

Please note that after resetting the router you have to enter your ISP information into it. So please note down these data before resetting your router.

To reset your router follow these steps:

  1. Keep the router in ON state.
  2. See at the backside of the router there is a hole and inside that, there is a reset button.
  3. Press the reset button using a pin.
  4. Wait for 2 minutes.
  5. Now enter the ISP data.

Now try connecting to the website and check if the error is resolved or not.

Disable/Enable Proxy Server

It is very common that you are using a proxy server. If you are using a proxy server outside your organization then it changes how your computer connects to the internet. This can cause the error message http err_address_unreachable. You should enable and disable the proxy server according to the situation.

Follow these steps to disable/enable the Proxy server:

Step 1: Press Windows key + R to open Run windows.

Step 2: Input inetcpl.cpl and hit enter. Internet properties will get opened.

Step 3: Go to the connection option.

Step 4: Click on LAN Settings.

Step 5: Uncheck Use a proxy server for your LAN to disable it and check to enable it.

Step 6: Click on ok.

Now try to open the website in google chrome and see if the error is fixed.

Clear Chrome’s Browsing History

When we browse a website its search history and cookies are stored in the browser. In some cases, these cookies get corrupted which becomes the reason for this error. Clearing Browsing data will help you.

Go through these steps to clear chrome’s browsing history:

Step 1: Open Chrome Browser.

Step 2: Click on the three dots at the top right corner.

Step 3: Go to settings.

Step 4: Go to privacy and security.

Step 5: Go to Clear browsing data.

Step 6: Select the Advanced tab.

Step 7: Change the time range to all.

Step 8: Mark these items- Browsing History, Cookies and other site data, Site Settings, Hosted app data.

Step 9: Click on clear data.

Clear Chrome DNS Cache

Google Chrome stores the DNS domain name system data of the websites which sometimes causes an error. To fix err address unreachable you should flush Chrome’s DNS cache.

These are the steps to clear Google chrome’s DNS cache:

  1. Open Google chrome.
  2. Type chrome://net-internals/#dns in address bar and press enter.
  3. Now click on clear host cache.

As the DNS cache cleared try opening the website if it opens or not.

Disable the Firewall and Antivirus

Firewall and antivirus sometimes block some websites from loading and this becomes the reason for the err_address_unreachable error. You have to disable the firewall and antivirus and try to connect to the website. If these are causing the error then after disabling these, the error will be resolved.

Resetting TCP/IP

TCP/IP is an internet protocol responsible for the communication between two different computers. Due to interruption on the computer sometimes TCP/IP causes this error address unreachable https. To reset TCP/IP you need to access the command prompt.

Here are the steps to reset TCP/IP:

  1. Open Run Windows (Windows key + R).
  2. Type cmd and press shift + ctrl + enter to run command prompt.
  3. Input these commands one by one and hit enter- ipconfig/release, ipconfig/all, ipconfig/flushdns, ipconfig/renew, netsh int ip set dns, netsh Winsock reset.
  4. Now Exit the command prompt.
  5. Restart your computer.

Try Disconnecting Wifi and Connecting again

Sometimes there is a situation where you are seeing a full signal of wifi and connected properly but in actuality, the data transmission is not being done. So in this situation, your wifi causes the error Net::err_address_unreachable. To fix this issue Disconnect your wifi and again connect the wifi to your device.

Remove Chrome Extension

There are some google chrome extensions that may be preventing access to a webpage. To fix this error remove the chrome extension and try connecting website. If the problem is solved then again you can add those extensions one by one and check which extension is causing this error.

Also Read: How to disable Full Screen Caller ID in Truecaller

Disable DNS Prediction

DNS Prediction is a feature of the Chrome browser to predict the domain name system of websites for faster browsing. It sometimes confuses the browser and so causes the error_address_unreachable and Dns_probe_finished_nxdomain error. To fix this issue disable the DNS prediction in google chrome.

Follow these steps to disable DNS prediction in Chrome:

  1. Open Chrome browser.
  2. Go to Settings.
  3. Go to Privacy and security settings.
  4. Tap on Cookies and other site data.
  5. Now scroll down there is an option, Preload pages for faster browsing and searching. Toggle it to disable DNS prediction.

What if Nothing worked for err_address_unreachable Chrome Windows 10

After applying all the fixes if you are still getting the err address unreachable error then the reason for this error is not from your end. Your system may be working fine and the reason for his error could be one of the following:

  1. Any specific website would be showing this error because of its server down issue. The best option is to wait till the server starts responding.
  2. The problem could be with your chrome browser. Try to open the website in another browser or in a chrome mobile browser. If a website gets opened then your chrome browser is causing the error. So, uninstall the chrome browser and install again the latest version.

If still, you are getting the err_address_unreachable error message then you should contact a computer specialist and also contact your internet service provider to resolve this issue.

How to fix err_address_unreachable Android Chrome? 

If you are using your mobile phone and surfing on chrome mobile then you can also get this err address unreachable error message. To fix this First of all check your internet connectivity and if the internet is ok then reboot your device. This will surely fix the err_address_unreachable chrome mobile issue.

The ERR_ADDRESS_UNREACHABLE error on Android usually occurs when your device is unable to establish a connection to the website you’re trying to access.

This can be due to various reasons, including network issues or problems with the website itself. Here are some steps you can take to fix this error:


 Fixing err_address_unreachable Android Phone

Check if the mobile internet or the wifi working properly. If the internet is fine then the error could be on the server side. If the server is responding on another device then try one of the fixes from below.

1. Check your internet connection

Make sure your device is connected to a stable internet connection. Try resetting your Wi-Fi router or turning off mobile data and then turning it back on.

2. Clear browsing data

Sometimes clearing the cache, cookies, and browsing history can help fix the error. Open your browser’s settings and select “Clear browsing data” or “Clear cache.”

3. Disable VPN

If you’re using a VPN service, try disabling it temporarily and then try accessing the website again.

4. Disable the firewall

If you have a firewall installed on your device, try disabling it temporarily and then try accessing the website again.

5. Check the website status

Sometimes the website itself may be down or experiencing technical difficulties. Check the website status by visiting a website status checker or contacting the website administrator.

6. Restart your device

Restart your Android device and then try accessing the website again.

7. Turn on/off flight mode

Turn on flight mode, wait for one minute and turn it off.

8. Uninstall and install chrome again

If you are still facing the error err_address_unreachable on android chrome then uninstall chrome browser on your phone and install it again.

9. Try a different browser

If you’re still experiencing the error, try accessing the website on a different browser.

Try connecting to the website you want. I am very sure that one of the fixes will definitely work for you.

If none of the above solutions work, you may need to contact your internet service provider or seek further technical assistance.

Also Read: How to Remove 3D Bitmoji on Snapchat | Change 3D Bitmoji to 2D

How do I fix err_address_unreachable mac?

If you are getting the error message err address unreachable chrome mac then troubleshoot your chrome browser and mac book. Try restarting your system and modem, check the internet connectivity, clear the chrome cache, and browsing history. To troubleshoot in advance read the above fixes in detail and step-by-step process.

Frequently Asked Questions on how to fix err_address_unreachable

What do I keep getting this site can’t be reached 127.0.0.1 refused to connect

It means that when google chrome tries to connect to some website but due to some reason it is unable to connect to that website then in that case google chrome shows this site can’t be reached message. There are many reasons for this like server down, internet problem, system issue, browser issue, cache problem, etc. You can troubleshoot it by trying the above methods.

There is another case when the website entered is refusing to connect your browser then chrome shows this site can’t be reached 127.0.0.1 refused to connect message. Most of the time reason for this is that site is under maintenance or the server is down. This error is usually fixed in some time, you just have to wait for it.

Why some sites are unreachable and How do I fix an unreachable website?

Some websites are unreachable because of server issues like they could be down or under maintenance. To access an unreachable website you have to wait till the server gets active. But if the server is responding well on another device then the problem could be on your side. You have to fix this issue on your side (follow the above process) then you can access an unreachable website.

How do I clear my cookies Chrome?

Cookies are temporary data of a website stored on a web browser while surfing on the internet. The cookies allow google chrome to load a website faster. Sometimes cookies get corrupted which causes chrome to show this error err_address_unreachable and sometimes websites take so long to respond.

To clear cookies in Google Chrome follow these steps:

    1. Open the Google Chrome Browser.
    2. Click on the three dots at the top right corner.
    3. Tap on the Settings option.
    4. Go to privacy and security settings.
    5. Tap on Clear browsing data.
    6. Select the Advanced tab.
    7. Change time range to all.
    8. Mark cookies if you want to clear cookies.
    9. Click on clear data.
    10. Done! Chrome cookies have been cleared.

    What is Err_timed_out?

    When you try to open a website on google chrome and chrome takes too long to load and finally failed to load the website then this Err_timed_out error appears. The main reason for this error is a slow internet connection or down server. If the internet is slow then refresh the page it will work and if the server is down, then wait for some time it will be fixed by default.

    When you encounter the “site is unreachable” error, it means that your device is unable to connect to the website you’re trying to access. There can be various reasons for this error, including network issues, website downtime, or problems with your device or browser.

    To fix this error, start by checking your internet connection and resetting your Wi-Fi router or turning off mobile data and then turning it back on. You can also try clearing browsing data, disabling VPN or firewall temporarily, checking the website status, trying a different browser, or restarting your device.

    Also read: How to check Bluetooth version on Android 

    If you are unable to access any website and all of them appear to be unreachable, it is likely that there is an issue with your internet connection. This could be due to a variety of reasons such as a problem with your router, network congestion, or issues with your internet service provider.

    Other potential causes of this issue could be firewall or antivirus software blocking access to the internet or even malware on your device.

    To resolve this issue, you can try resetting your router, checking your network settings, disabling firewall or antivirus temporarily, or scanning your device for malware.

    Your address may be unreachable due to connectivity issues. This can happen when your device is unable to establish a connection to the website or IP address you’re trying to access, which can be caused by network problems, website downtime, or issues with your device or browser.

    Also Read: How to Fix Unfortunately the process android.process.acore has Stopped

    How to fix address_unreachable , -109

    The “address_unreachable” is an error code that typically occurs in network programming when a client or server fails to establish a connection with the other party. The error code “-109” is often associated with this error message.

    This error can occur for a variety of reasons, including incorrect network configurations, firewalls blocking the connection, and the unavailability of the destination server or client.

    To troubleshoot this error, you can try checking the network configuration settings on both the client and server, verifying that any firewalls are allowing the necessary traffic, and ensuring that the destination server or client is running and available. You may also want to check for any software or hardware issues that could be causing the error.

    Conclusion for err_address_unreachable Android Chrome

    In this article, we have tried our best to show you how you can fix the err_address_unreachable error in Google Chrome on the computer and in Android mobile. We have covered all the reasons for err address unreachable error and its solutions with step by step guide to fix it.

    If you find this article helpful, please share this post and comment on your feedback and suggestions below. Keep visiting our blog for such useful content.